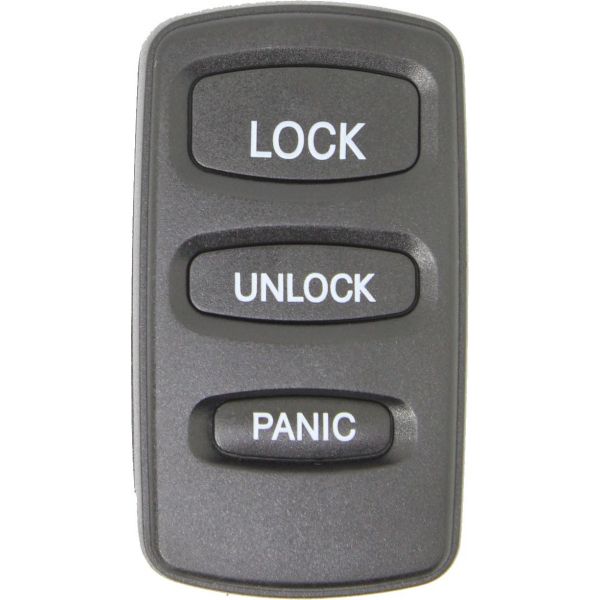
2000 - 2006 Mitsubishi 3 Button Keyless Entry Remote Fob - E4EG8D-522M-A
2000 - 2006 Mitsubishi 3 Button Keyless Entry Remote Fob - E4EG8D-522M-A
2000 - 2006 Mitsubishi 3 Button Keyless Entry Remote Fob - E4EG8D-522M-A
Fits:
2000 - 2006 Mitsubishi Montero
2001 - 2003 Mitsubishi Montero Sport
180 Day Satisfaction Guarantee!
If you are not 100% satisfied with your product for any reason, you may return the product within 180 days of ordering for a replacement. Please see our return policy for further information.
| SKU | 1919 |
|---|---|
| FCC Number | E4EG8D-522M-A |
| OE Part # | MR587977 |
| Support | Your purchase gives you 100% free e-mail and phone technical support from our expert staff. |
| Programming Information | SOME models come with self programming instructions. You can view them under the 'Programming Instructions' tab. All other models will need an automotive locksmith to come out and program the unit in for you. NOTE: When looking under the 'Programming Instructions' tab please look for your specific model as the programming instructions vary. |
| Product Condition | Refurbished |
| Programming Instructions | 2000 Mitsubishi Montero 1. Open the driver's door. 2. Turn the ignition key ON (ON is the position just shy of cranking the engine). 3. Press and hold the programming/override button (located under or at the bottom of the driver's side dash). In approximately 20 seconds the system will start to cycle the door locks and the siren (if equipped) 3 times to indicate the system has entered the transmitter learn mode (DO NOT RELEASE THE PROGRAMMING/OVERRIDE BUTTON). 4. Press the #1 button (top left button) on the unprogrammed transmitter. The system will respond by cycling the door locks and the siren (if equipped) one time to indicate the transmitter has been learned. 5. All other transmitters (up to four) also need to be programmed at this time. 6. Programming is now complete, let go of the programming/override button and turn ignition off to exit learn mode. Test all remotes for proper programming.
2001 - 2006 Mitsubishi Montero 1. Locate the Data Port under drivers side dashboard usually located to the right of steering column. 2. Insert keys in ignition and leave in the OFF position. 3. Make sure there are metal contact pins in terminals 1 and 4 and connect the Data Port terminals 1 and 4 with a suitable jumper wire, leave the jumper wire connected throughout the programming procedure. Make sure you know which terminals are 1 and 4. 4. Within 10 seconds after connecting the jumper wire, press the Hazard Switch 6 times. Note: The doors will automatically lock and unlock once at this time indicating that the system is in the programming mode. 5. Press the LOCK button on the remote to be registered three times within 10 seconds. Upon successful programming, the door will lock and unlock once. 6. Repeat step 5 with up to 4 remotes (including any existing remotes) within one minute. After completing each programming, the doors will lock and unlock once. 7. Disconnect the programming wire and remove the keys from the ignition. 2001 - 2003 Mitsubishi Montero Sport Diagram of Data Link Connector (DLC) Obtain all remote transmitters for this vehicle. This procedure's a little more complicated than others, we recommend having someone help you perform this procedure. We have found it easier to have one person manage the jumper wire while the second person performs the procedure. 1. Locate the Data Link Connector (DLC). It will be under the dash on the drivers side. You may need to lay on the floor and look up to easily access it. Use the diagram above to identify ports 1 and 4. Notice that the DLC connector is tapered. You can use this to help identify the proper ports. Be sure there's metal contact pins in ports 1 and 4. 2. Insert key into the ignition and leave in the OFF position. 3. Using a suitable jumper wire, jump pin 1 to pin 4. Jump means to make a connection between the two pins using any metal wire. A paperclip bent in the shape of a "U" usually works perfect. Be certain the jumper wire makes contact with the pins in ports 1 and 4. Once the jumper wire is installed it needs to remain there throughout this procedure until instructed to remove. 4. Within ten seconds of connecting the jumper wire, turn the ignition switch to ACC then back to off, THREE times. You must do this step very quickly, all three cycles should take 2-3 seconds. (ACC is the position when you turn the key back toward you, OFF is the position where you can remove your key). The doors will automatically lock and unlock once indicating the vehicle is in programming mode. 5. Now press the LOCK button on the first remote to be programmed THREE TIMES within ten seconds. The doors will automatically lock and unlock once indicating the vehicle has programmed that remote. 6. If you have additional remotes to program, repeat step 5. within one minute. 7. Once all remotes are programmed remove jumper. Test all remotes to ensure proper programming. |
| msrp | 153.55 |


