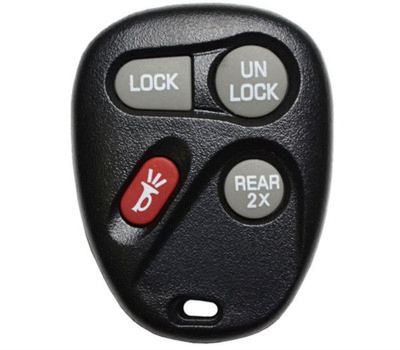
1996 - 2002 GM 4 Button Keyless Entry Remote Fob - AB01502T/ABO1502T
The 1996 - 2002 GM 4 Button Keyless Entry Remote Fob - AB01502T/ABO1502T offers a reliable and convenient solution for controlling your GM vehicle. This remote fob includes 4 buttons that provide essential functions such as lock, unlock, trunk, and panic. Designed for easy use and functionality, this key fob is an ideal replacement for your lost, damaged, or worn-out GM keyless entry remote.
With its durable construction, the AB01502T/ABO1502T fob ensures long-lasting performance and reliable access to your vehicle. Whether you need a keyless entry remote fob for convenience or as a replacement for a malfunctioning unit, this remote will meet your needs.
Key Features:
4 buttons for lock, unlock, trunk, and panic functions
Keyless entry remote fob design for easy access to your vehicle
OEM replacement for lost or damaged remotes
Durable and reliable construction
Easy to program with compatible GM vehicles from 1996 to 2002
This fob is designed to be compatible with select GM vehicles from 1996 to 2002, making it an excellent option for anyone needing to replace their original keyless entry remote. The included 4 buttons ensure that all essential vehicle functions are easily accessible, enhancing convenience and security.
| SKU | 916 |
|---|---|
| FCC Number | AB01502T/ABO1502T |
| OE Part # | 16245100-29 |
| Support | Your purchase gives you 100% free e-mail and phone technical support from our expert staff. |
| Programming Information | This remote comes with self programming instructions. You can view them under the 'Programming Instructions' tab. NOTE: When looking under the 'Programming Instructions' tab please look for your specific model as the programming instructions vary. |
| Product Condition | Refurbished |